Barcode Scanner + Live Coding
A few days ago, I was at ZKM with Toplap Karlsruhe, where we presented live coding as part of kamuna.
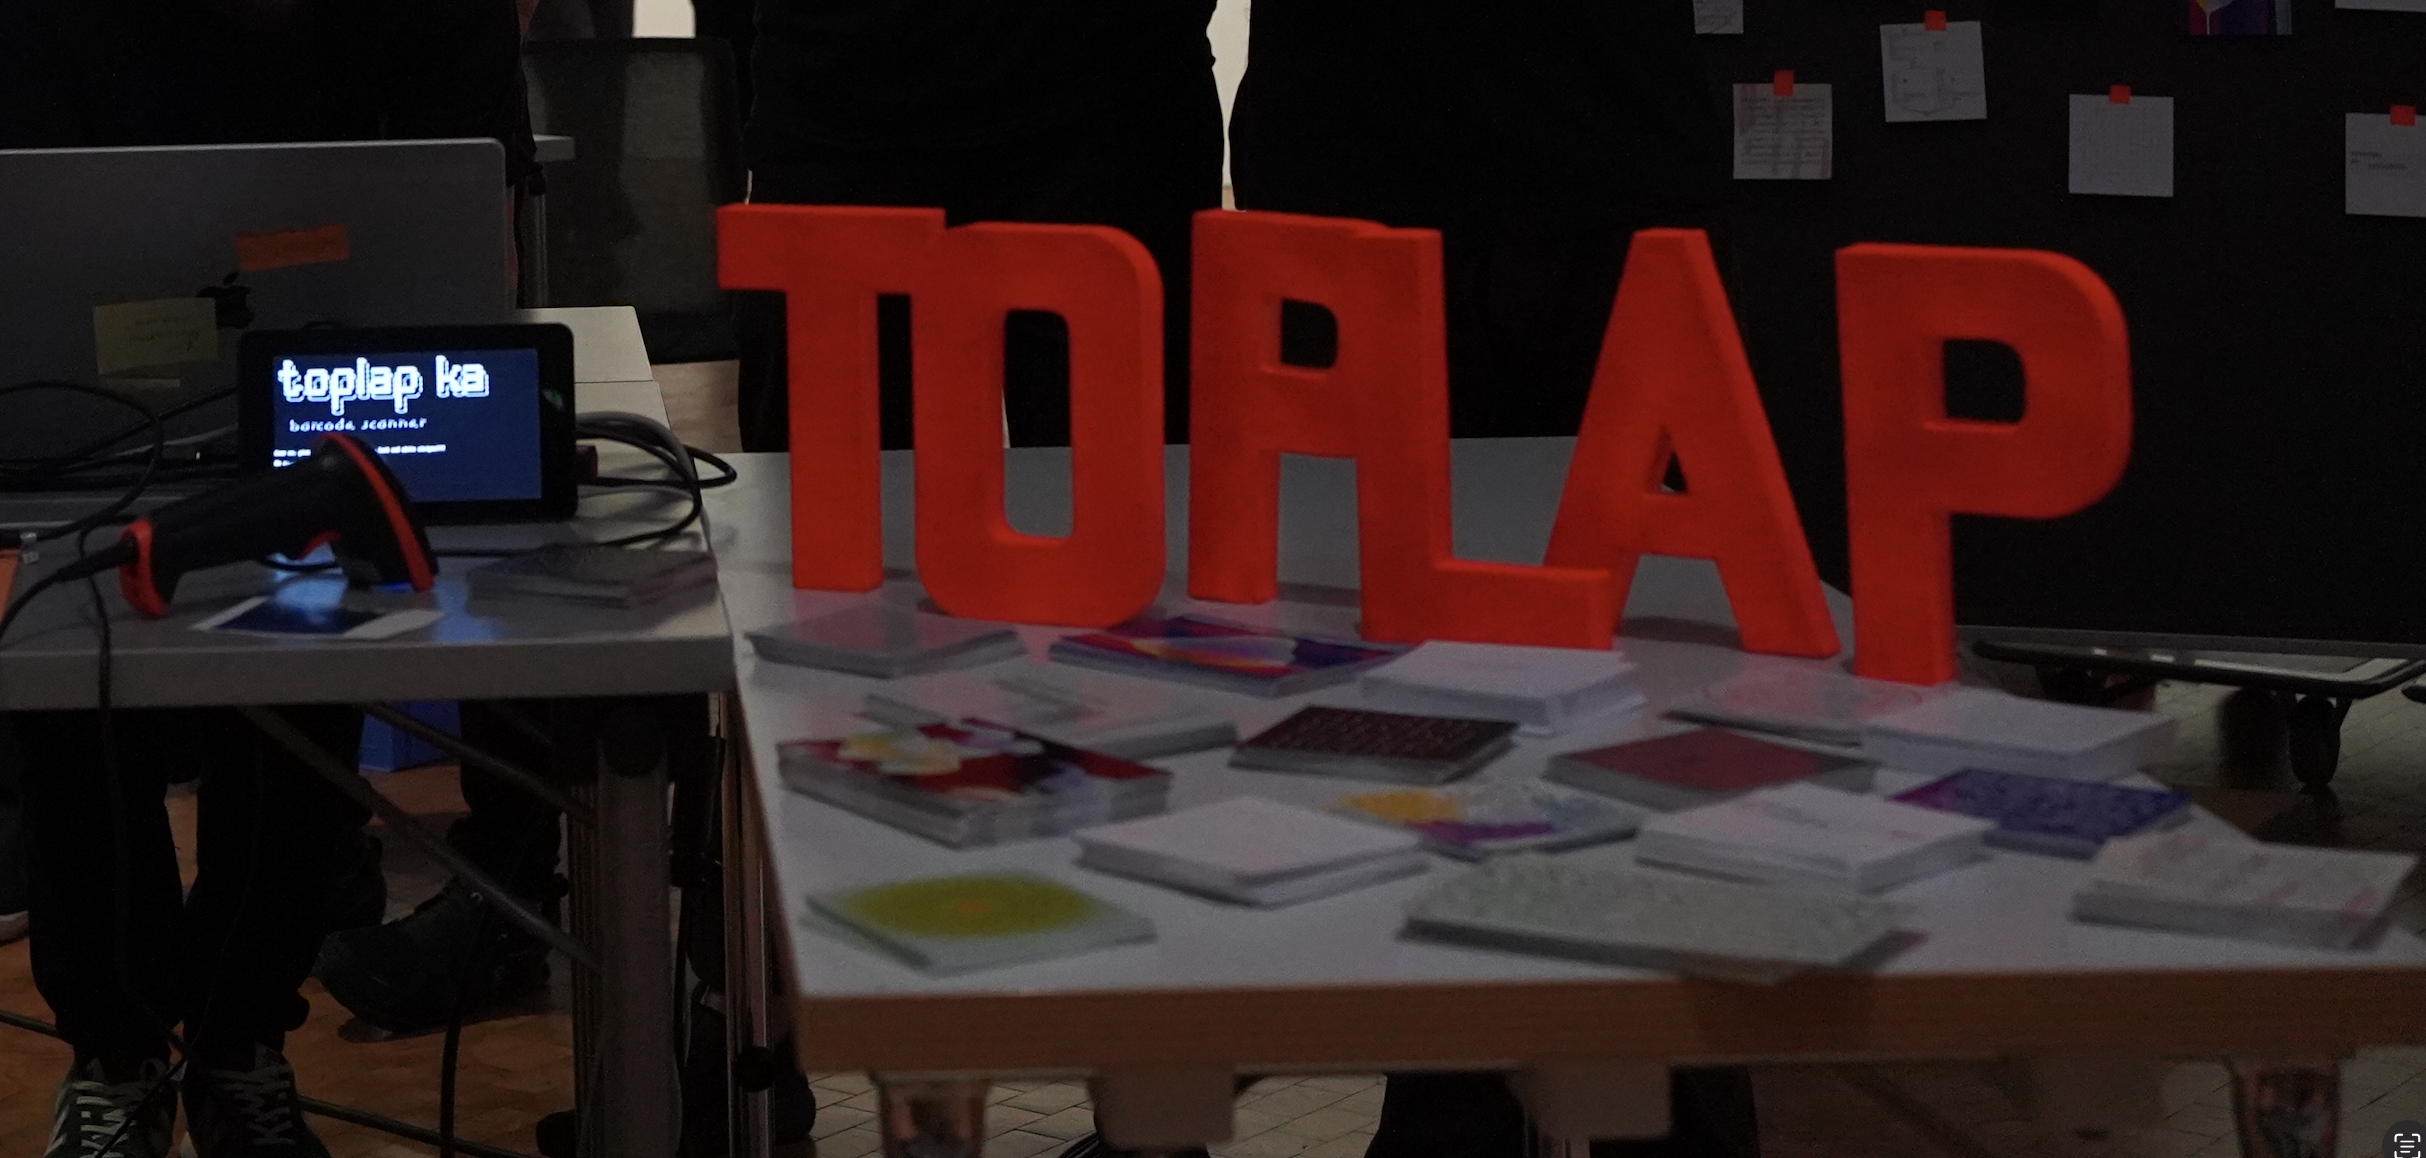
We had a booth where we presented code snippets of different live coding systems (SuperCollider, Hydra, Strudel). To make the interaction more fun and also more quick, we used a barcode scanner + flyers that people could find. Our stand looked like this:
why barcodes
If you’re not living under a rock, you have most likely encountered the lovely black and white stripes that are called barcode. The purpose of a barcode is to be able to quickly identify things in the real world, mostly products. This identification is done though a code, which is a number or a string of characters associated with said thing. The handy thing about barcodes is that you can quickly enter the code of the thing with a simple motion, instead of needing to write it by hand. Barcodes look the way they do because it is technically much simpler to scan vertical lines than it is to scan characters or numbers.
how the scanner works
Of course I had to open the scanner. This is how I think it works:
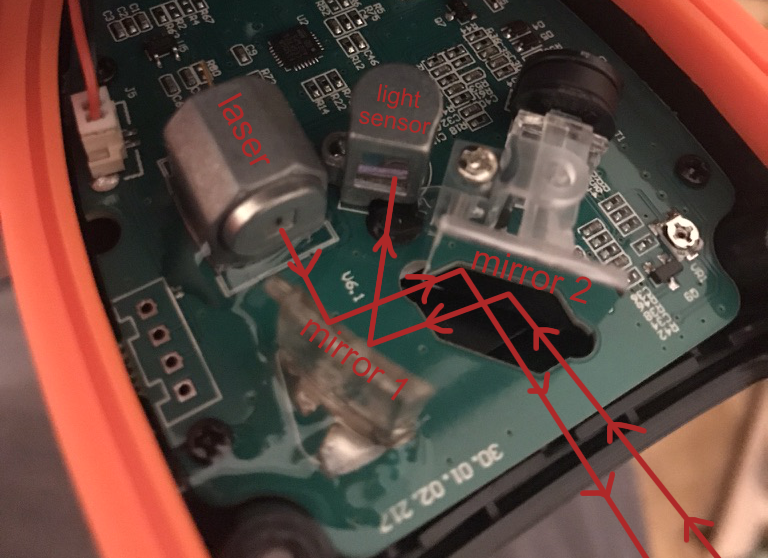
- Laser shoots
- light reflects off mirror 1
- light reflects off mirror 2
- light reflects off barcode
- light reflects off mirror 2
- light reflects off mirror 1
- light hits light sensor
It is important to note that mirror 2 is movable, turning the laser dot into a line:

this line allows the laser to travel along the whole barcode at a fixed rate. The movement of mirror 2 is controlled by the black electromagnet at the back of it (i think).
The light sensor turns the reflected light into voltage, which is higher for white (more reflection) than it is for black (less reflection). That voltage is probably turned into a digital signal, which then looks like a pulse wave:

(I think this pulse wave is also used by this cool project) This pulse wave can then be serialized into bits which can be used by the microprocessor to generate decode the barcode.
When a code is recognized, the scanner produces the iconic beep sound and sends a line of characters to the computer, acting like a keyboard!
The System
So if we want to react to a scan, we have to make sure we’re in text field that reacts to the input. This is not really practical in a setting where people are interacting with a live coding software at the same time, as it could happen that a scan is missed. This is why I decided to offload the barcode scanning to a separate device.
The whole system looks like this:
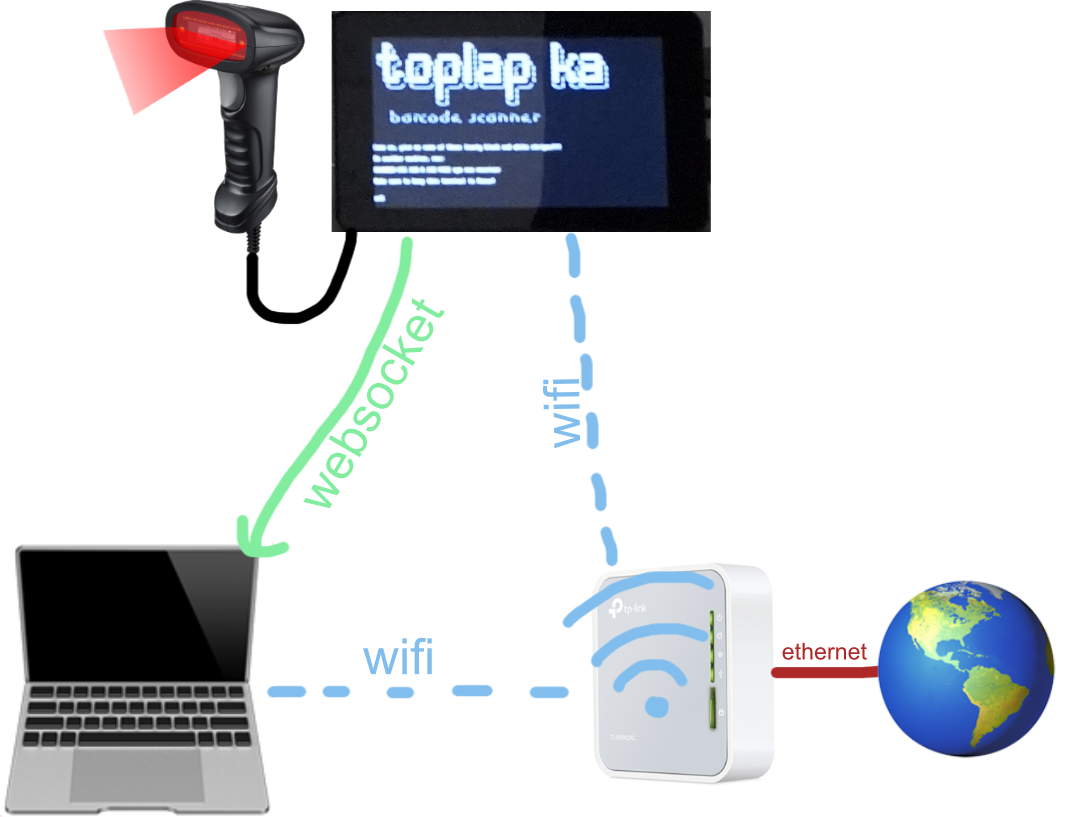
Hardware:
- Scanner + Raspberry Pi + 7” screen
- Router
- Computer(s)
The basic idea is that the scanner writes the code to the raspberry pi’s terminal, where a script is running. That script recognizes the code and sends it via a websocket to the computer. The computer can then react to the code without needing to have a text field in focus. The websocket connection will only work if both devices are in the same network, which is why we used a little router.
Using websockets also has the advantage that multiple computers can be used as receivers!
Generating Barcodes
You can either use this website or use this lib
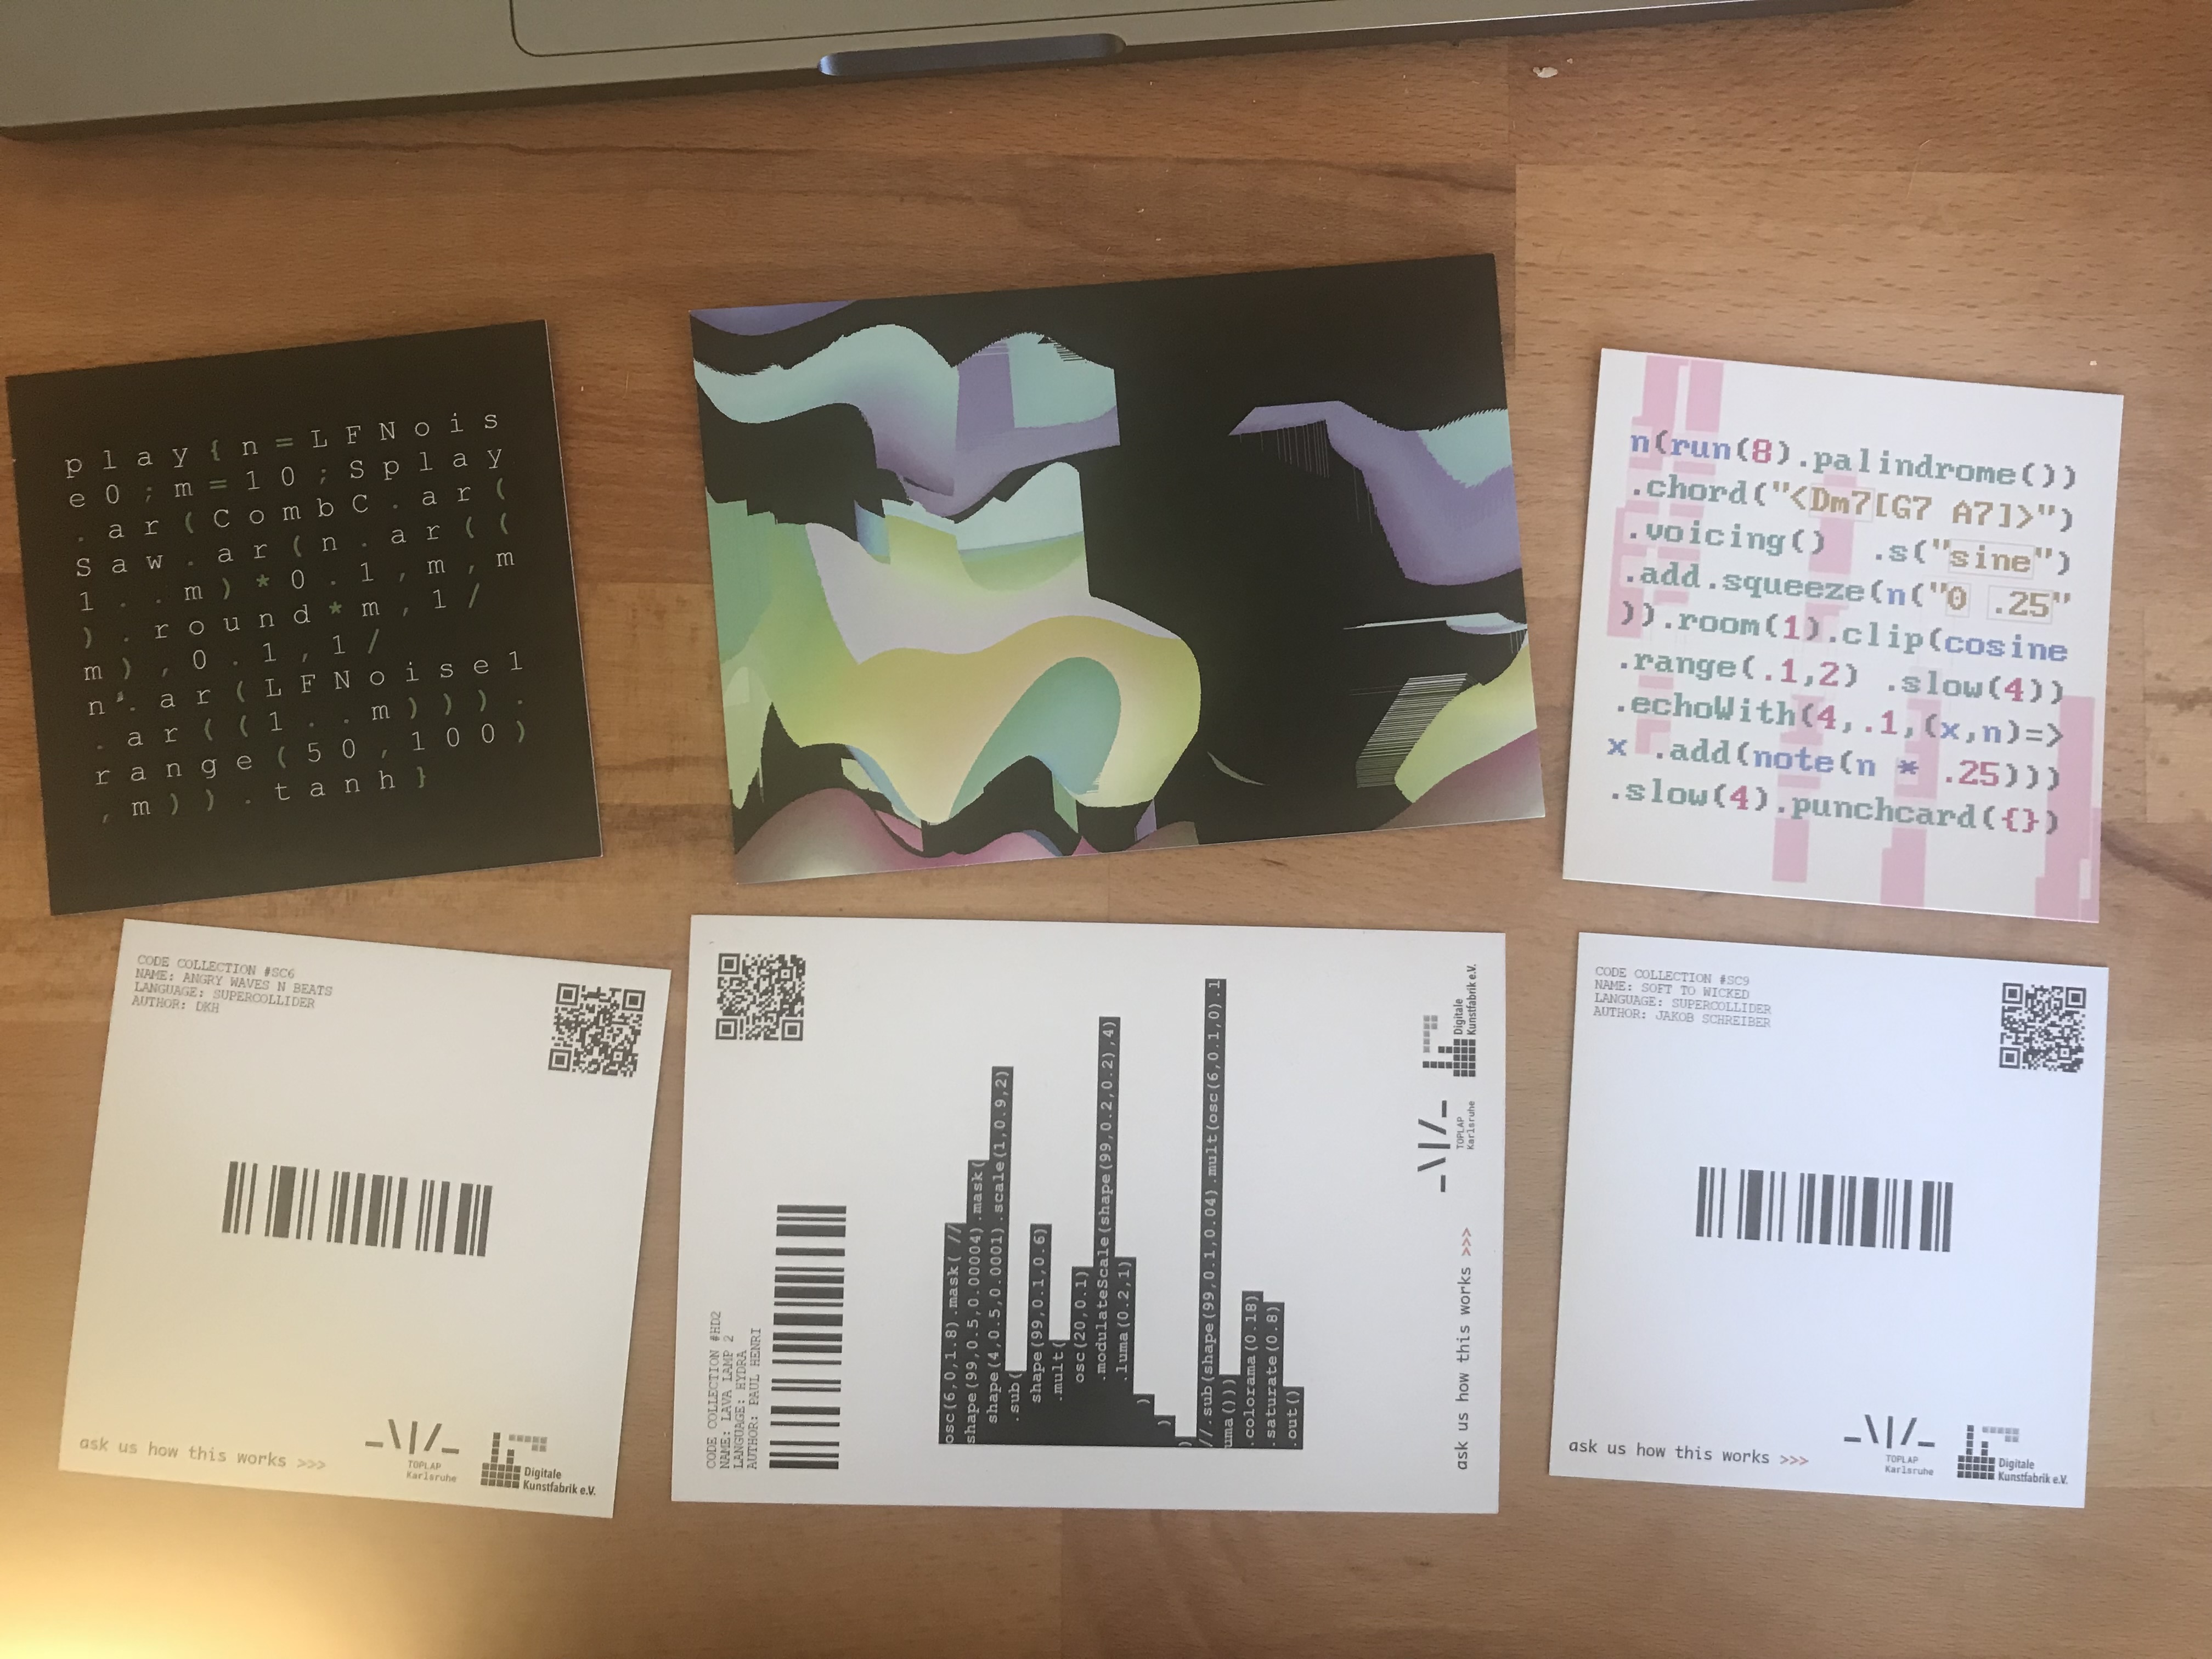
Here are some of our Flyers:
Demo
Here’s a little Demo of how the interaction looks like:
The Code
You can find the full code in this repo. It basically contains 2 node scripts, one for the raspberry pi and one for the receiving computer. On the receiver, you can decide what an incoming code should do (or ignore it). For our purpose, we wanted to open code snippets in 3 different systems, which needed different reactions:
- SuperCollider: opens supercollider from the command line
- Strudel + Hydra: open the default browser via open
To execute the code, we used osascript to press ctrl+enter from the terminal.
Barcodes as a Performance Tool
Instead of reacting to scanned flyers, I also used barcodes to allow the audience to control my visuals.
Instead of using the node script for receiving codes, they can also be received via Strudel directly. Here is a simplified example of what I did:
const socket = window.socket || new WebSocket("ws://192.168.1.36:4422");
socket.onmessage = (event) => {
  window.code = Number(event.data.slice(-3, -1));
  console.log("scanned", event.data, window.code);
};

const ref = (getter) =>
  pure(1)
    .withValue(() => reify(getter()))
    .innerJoin();
window.code = 42;
const codeRef = ref(() => window.code);

note(codeRef).fast(2).s("sawtooth").clip(0.125).delay(0.5);
replacing 192.168.1.36 with the IP of the raspberry pi, the above code will receive barcodes directly in the Strudel REPL.
For each new code, the global variable window.code will be updated. That variable is then used with a ref to dynamically set the note value.
(I took inspiration here.)
Here’s another demo of the code above:
Conclusion
Using Barcodes proved to be a fun and engaging way to present and interact with code. I will most likely try to find more ways of interaction between strudel and barcodes!